How To Use Movo Microphone?
To use a Movo microphone, follow these steps:
1. Connect the microphone to your device using the appropriate cable. Movo microphones typically come with a 3.5mm TRS or TRRS cable, depending on the model.
2. Turn on your device and open the recording app or software you want to use.
3. Select the Movo microphone as your input device in the app or software settings.
4. Adjust the microphone's volume and gain settings to achieve the desired sound quality.
5. Position the microphone close to the sound source for optimal recording.
6. Start recording and monitor the audio levels to ensure that the sound is clear and free of distortion.
7. When you're finished recording, save the file and edit it as needed.
Overall, using a Movo microphone is a straightforward process that requires only a few basic steps. With proper setup and positioning, you can capture high-quality audio for a variety of applications, from podcasting and vlogging to music production and voiceovers.
1、 Movo microphone setup
How to use Movo microphone:
1. Connect the microphone to your device: Movo microphones come with different connectors, so make sure you have the right one for your device. Connect the microphone to your device's audio input jack or USB port.
2. Adjust the microphone settings: Depending on your device, you may need to adjust the microphone settings. For example, on a Windows computer, you can go to the Sound settings and select the Movo microphone as the default recording device. On a Mac, you can go to the System Preferences and select the Movo microphone under the Sound settings.
3. Position the microphone: The position of the microphone can affect the quality of the sound. For best results, position the microphone close to your mouth and away from any background noise.
4. Test the microphone: Before you start recording, test the microphone to make sure it's working properly. You can use the built-in recording software on your device or download a third-party app.
5. Start recording: Once you're ready to record, start the recording software and speak into the microphone. Make sure to speak clearly and at a consistent volume.
Movo microphone setup:
1. Unbox the microphone: When you receive your Movo microphone, unbox it carefully and make sure all the components are included.
2. Connect the microphone to the stand: Most Movo microphones come with a stand or a clip. Attach the microphone to the stand or clip according to the instructions.
3. Connect the microphone to your device: Follow the steps above to connect the microphone to your device.
4. Adjust the microphone settings: Follow the steps above to adjust the microphone settings.
5. Position the microphone: Follow the steps above to position the microphone.
6. Test the microphone: Follow the steps above to test the microphone.
7. Start recording: Follow the steps above to start recording.
In conclusion, using a Movo microphone is a simple process that can greatly improve the quality of your recordings. With the right setup and positioning, you can capture clear and crisp audio for your videos, podcasts, or music recordings.
2、 Adjusting microphone settings
How to use Movo microphone:
1. Connect the microphone to your device: Movo microphones come with different connectors, so make sure you have the right one for your device. Connect the microphone to your device's audio input port.
2. Turn on the microphone: Some Movo microphones have an on/off switch. Make sure the microphone is turned on before you start recording.
3. Position the microphone: Depending on the type of Movo microphone you have, you may need to position it differently. For example, if you have a lapel microphone, clip it onto your clothing near your mouth. If you have a shotgun microphone, point it towards the sound source.
4. Start recording: Once you have connected and positioned the microphone, start recording using your device's audio recording app or software.
Adjusting microphone settings:
1. Volume: Adjust the microphone volume to ensure that the sound is not too loud or too soft. You can do this using your device's audio settings or the microphone's volume control.
2. Directionality: Some Movo microphones have directional settings that allow you to adjust the directionality of the microphone. This is useful if you want to focus on a specific sound source.
3. Noise reduction: Some Movo microphones have noise reduction features that help to reduce background noise. This is useful if you are recording in a noisy environment.
4. EQ settings: Some Movo microphones have EQ settings that allow you to adjust the bass, midrange, and treble levels. This is useful if you want to enhance the sound quality of your recordings.
In conclusion, using a Movo microphone is a simple process that involves connecting the microphone to your device, positioning it correctly, and adjusting the microphone settings. With the right settings, you can produce high-quality recordings that are free from background noise and have excellent sound quality.
3、 Connecting to recording device
How to use Movo microphone? The first step is to connect it to a recording device. The Movo microphone comes with a variety of connectors, including USB, XLR, and 3.5mm jack, so you can choose the one that is compatible with your recording device. Once you have connected the microphone to your device, you need to adjust the settings to ensure that the microphone is recognized and configured correctly.
If you are using a computer, you may need to adjust the audio settings in your operating system or recording software. Make sure that the Movo microphone is selected as the input device and adjust the volume levels as needed. You may also want to experiment with different recording settings, such as sample rate and bit depth, to find the best configuration for your needs.
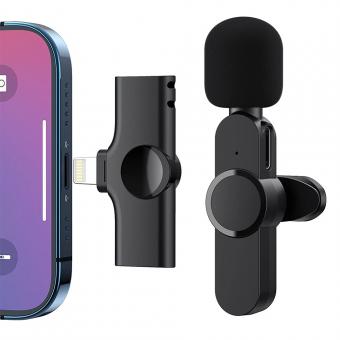
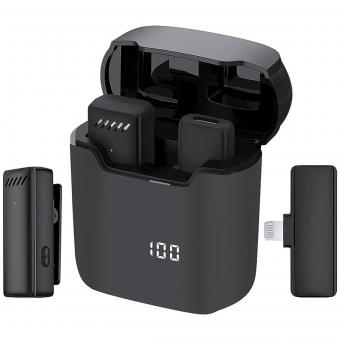
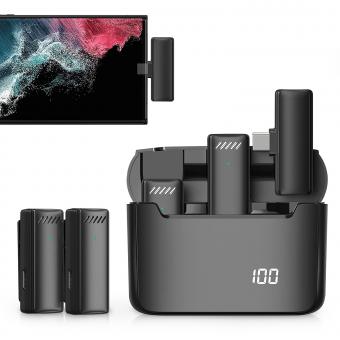
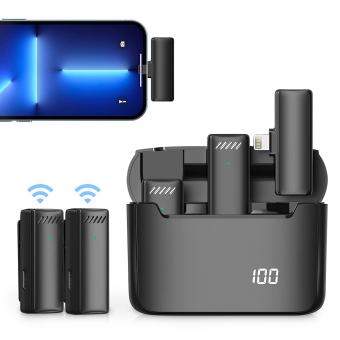
If you are using a mobile device, such as a smartphone or tablet, you may need to use an adapter to connect the Movo microphone. Once connected, you can use a recording app to capture audio. Make sure that the app is configured to use the Movo microphone as the input device and adjust the recording settings as needed.
In conclusion, using a Movo microphone is a simple process that involves connecting it to a recording device and adjusting the settings to ensure that it is recognized and configured correctly. With the right setup, you can capture high-quality audio for a variety of applications, from podcasting and vlogging to music recording and live streaming.
4、 Positioning the microphone
How to use Movo microphone:
1. Positioning the microphone: The first step in using a Movo microphone is to position it correctly. The microphone should be placed close to the sound source, such as the speaker's mouth or the instrument being played. This will ensure that the microphone picks up the sound clearly and accurately. It is also important to position the microphone away from any background noise or other sources of interference.
2. Connect the microphone: Once the microphone is positioned correctly, it needs to be connected to the recording device. Movo microphones typically come with a variety of connection options, including USB, XLR, and 3.5mm jack. Choose the appropriate cable and connect it to the microphone and the recording device.
3. Adjust the settings: Depending on the recording device and the type of Movo microphone being used, there may be various settings that need to be adjusted. These could include the gain, volume, and frequency response. It is important to read the user manual carefully and adjust the settings as needed to achieve the desired sound quality.
4. Test the microphone: Before recording, it is important to test the microphone to ensure that it is working properly. Speak or play into the microphone and listen to the playback to make sure that the sound is clear and free from distortion or interference.
5. Record: Once the microphone is set up and tested, it is ready to use for recording. Whether recording a podcast, music, or other audio, the Movo microphone should provide clear and accurate sound capture.
In conclusion, using a Movo microphone is a simple process that involves positioning the microphone correctly, connecting it to the recording device, adjusting the settings, testing the microphone, and then recording. With the right setup and settings, a Movo microphone can provide high-quality sound capture for a variety of audio recording needs.


