
Do You Need ND Filters for Drone?
If you've noticed your drone footage is overly bright, overexposed, or lacks a smooth, cinematic feel, you might be wondering how to fix it. That's where an ND drone filter comes in. ND (neutral density) filters act like sunglasses for your drone camera, helping to control light and motion for a more natural, cinematic effect. They're especially useful when shooting in bright sunlight, over water, snow, or reflective surfaces, where excessive light can ruin the image. If you're a drone photographer who demands high-quality footage, investing in the right ND filter is essential. Read my guide to learning how to choose the right ND filter for you and how to use it.
How to Choose ND filter for Drone?
ND filters adjust shutter speed and exposure, enabling creative effects in various scenarios. Choosing the right filter depends on the environment you’re shooting in. If this all sounds a little confusing, don't worry! Below are two useful tables to help you determine which ND filter you need:
ND Filter | Best for | Usage |
ND 2 | Low-light or overcast conditions with minimal light reduction. | Subtle motion blur (e.g., moving clouds, soft water ripples). |
ND 4 | Early mornings or late afternoons with soft sunlight. | Balancing exposure in shaded areas or light diffusion. |
ND 8 | Moderately bright conditions, such as cloudy days. | More pronounced motion blur (e.g., traffic trails, flowing water) |
ND 16 | Bright conditions, such as sunny mornings. | Significant motion blur (e.g., smoother water flow, traffic motion). |
ND 32 | Very bright conditions, such as strong midday sunlight. | Intense motion blur for dramatic effects (e.g., waves, fast-moving subjects). |
ND 64 | Very bright conditions, such as midday sun. | Dramatic long-exposure effects (e.g., silky waterfalls, extreme blur) |
ND Filter Reference Sheet For Scenarios
Scenarios | Recommended ND Filter | ISO | Shutter (for 30 fps) | White Balance (K) | Tips |
Snow / Ice / Mountains | ND64 → ND128 (ND64/PL to cut glare) | 100 | 1/60 | 6500–7000 | Add +0.3 EV; keep batteries warm. |
Beach / Desert / Sand Dunes | ND32 → ND64 (ND32/PL for reflections) | 100 | 1/60 | 5500–6000 | Clean filters often; set polarization before flight. |
Partly Cloudy / Variable Light | ND16 | 100 (or Auto 100–200) | 1/60 | 5500 | Lock shutter; shoot in D-Log/D-Cinelike for flexibility. |
Golden Hour / Sunrise / Sunset | ND8 → ND16 | 100 | 1/60 | 4500–5000 | Slightly raise ISO as light fades; preserve shadows. |
When to Use DJI ND Filters?
DJI holds the largest share of the drone market, making it the go-to example for aerial filming setups. In the following section, I’ll walk you through how to set up and use ND filters on DJI drones, step by step.
1. Balance Weight & Flight Stability
It’s smart to test before flight — take a short clip and check your histogram to avoid under/overexposure. High-quality ND filters are lightweight, but cheaper ones may affect the gimbal balance.
Always recalibrate your gimbal after changing filters.
Avoid stacking filters (like ND + CPL) unless your gimbal can handle it.
2. Setting up and using ND filters with your DJI drone
Set your drone’s camera to "Manual" mode via the DJI app to prevent automatic exposure corrections.
Lock ISO (as low as possible, usually ISO 100).
Set shutter speed and aperture manually (if available).
This prevents the drone from auto-adjusting mid-shot and changing your exposure mid-pan or tilt.
3.Choose the right ND Filter:
Check the exposure scale in your DJI app to identify overexposure.
Select the appropriate ND filter (e.g., ND4, ND8, ND16) to balance the image lighting.
Fine-tune camera settings until you achieve the desired result.
4.Always Do a Pre-Flight Check
Before launching:
Check for dust or fingerprints on the ND filter.
Verify exposure and focus in the preview.
Make sure your gimbal and motors aren’t strained by the added weight.
Bonus Pro Tip
lUse histograms or zebras on your drone’s display to check exposure. The screen brightness can be misleading outdoors — the histogram never lies.
lAlways power down the drone before attaching or removing filters to avoid damaging the gimbal.
Tips for Aerial Filming with ND Filters
By maintaining the ideal shutter angle, ND filters allow you to capture smooth and professional-looking footage that enhances the unique perspectives offered by drones.
Shutter Angle: Aim for a 180° shutter angle to create natural motion blur. For example, at 25fps, use a shutter speed of 1/50 of a second.
Effects of Shutter Angle changes:
Larger angles (e.g., 360°) result in excessive blur between frames.
Smaller angles (e.g., 45°) create jerky, stuttery footage.
Fixed ND filters, Variable ND Filters,and ND/PL:
1. Fixed ND vs Variable ND Filters
The first thing to understand is the difference between fixed ND filters and variable ND filters.
Fixed ND filters are available in set strengths like ND8, ND16, or ND32. These are the most reliable for drone videography. They offer consistent results and maintain image quality.
Variable ND filters, on the other hand, let you adjust the light reduction by rotating the filter. This is great for handheld cameras, but not for drones.
Most drone lenses are wide-angle, and variable filters can cause issues like vignetting or uneven exposure.
That’s why most professionals stick to fixed NDs when flying drones.
2. ND vs ND/PL
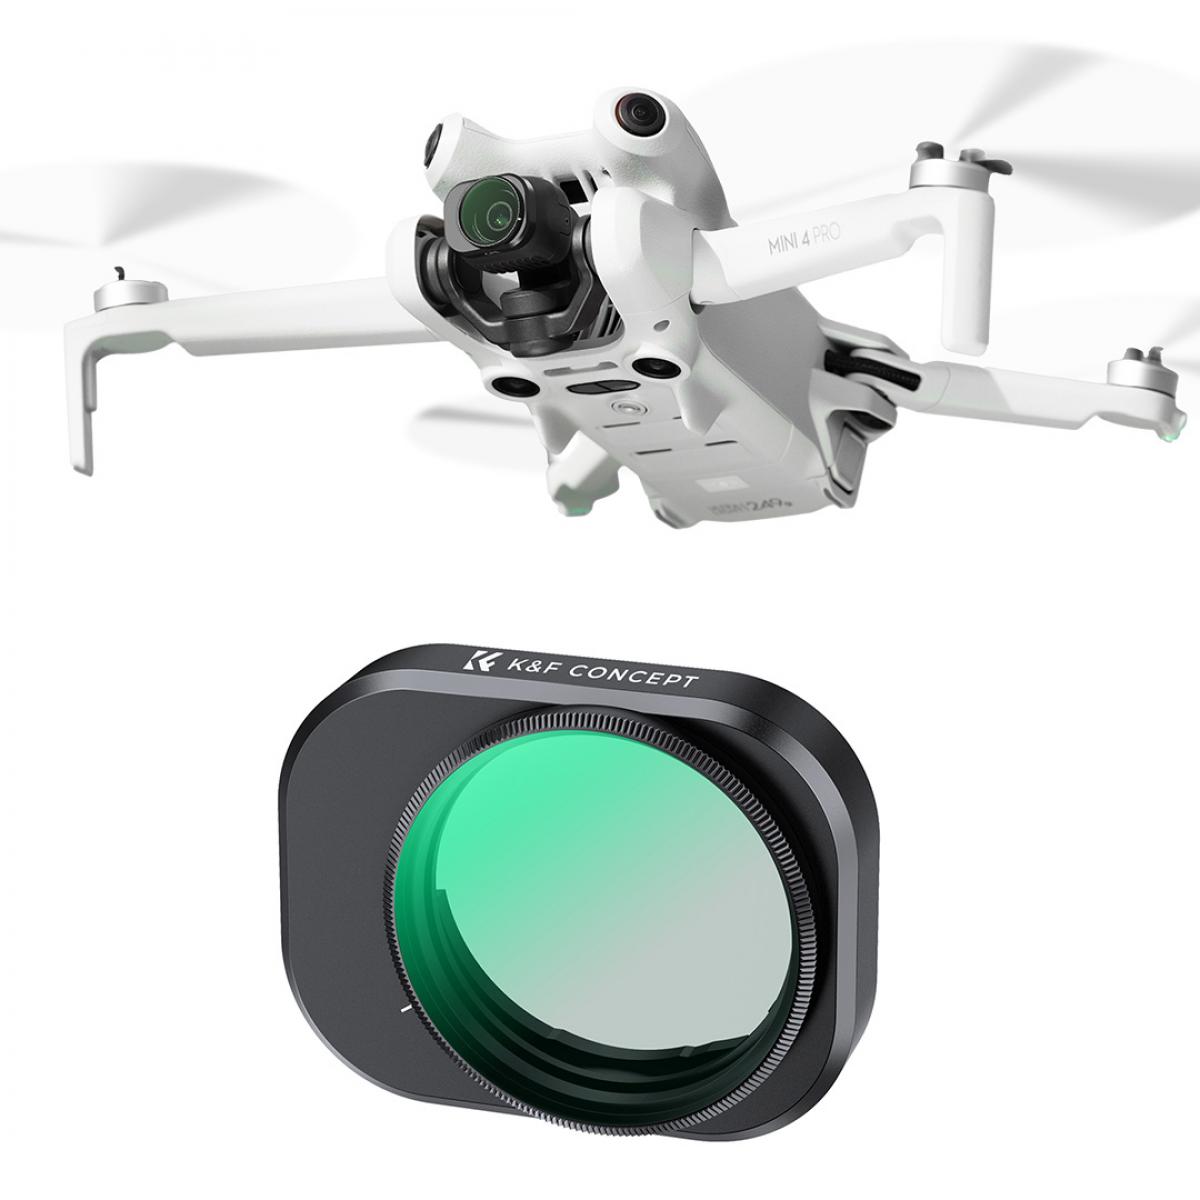
As you explore drone filters, you’ll likely find two main types: standard ND filters and ND/PL filters.
Both serve different purposes in drone videography, and choosing the right one depends on what and where you’re filming.
ND filters (Neutral Density) are used to control exposure by reducing the amount of light hitting the sensor.
Their main job is to let you maintain a slower shutter speed for proper motion blur, especially in bright conditions.
They’re simple, effective, and require no adjustment once mounted. These are ideal for general-purpose shooting in changing light or fast-paced environments.
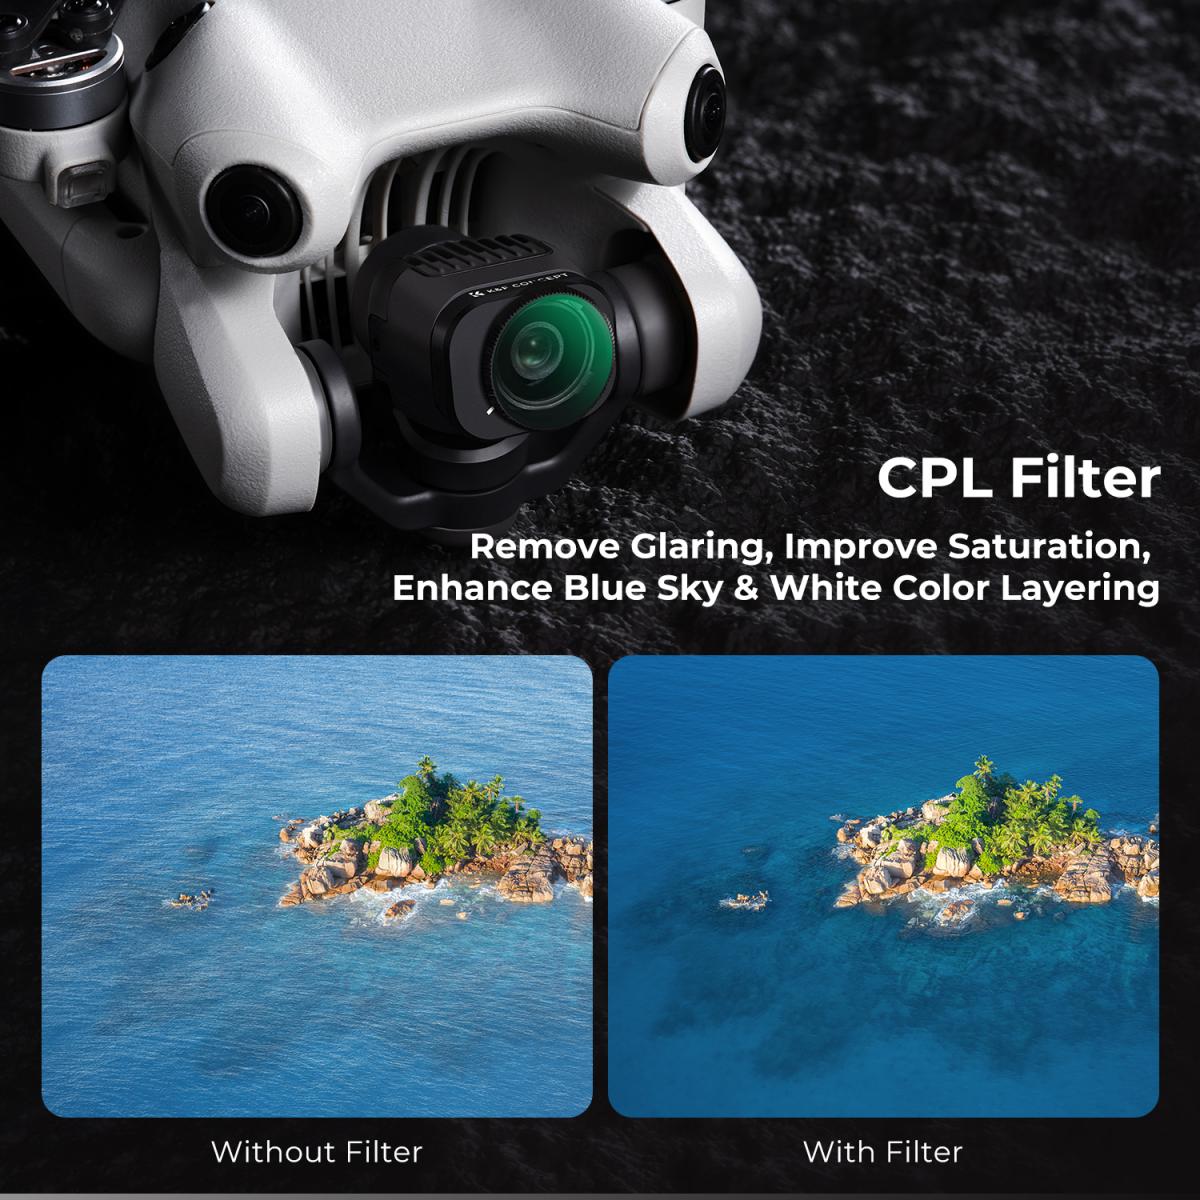
ND/PL filters are hybrid filters that combine ND functionality with a polarizing element.
Along with reducing light, they also reduce glare and reflections from surfaces like water, glass, snow, or wet roads.
Polarization enhances contrast and color saturation, which can dramatically improve the look of reflective scenes.
However, there’s a trade-off.
Conclusion
Mastering ND filters is a creative choice that elevates drone footage from ordinary to genuinely cinematic.
When you learn to use these filters with purpose, you gain control over three key elements of your videos: movement, light, and visual tone.
Like every other part of drone filmmaking, consistency stems from a deliberate process. The more you familiarize yourself with ND filters, the more seamlessly they’ll integrate into your pre-flight preparations.
Once using them becomes second nature, you’ll see tangible improvements: smoother footage, more cinematic motion, and far fewer unexpected issues during the editing phase.
1. Balance Weight & Flight Stability
It’s smart to test before flight — take a short clip and check your histogram to avoid under/overexposure. High-quality ND filters are lightweight, but cheaper ones may affect the gimbal balance.
Always recalibrate your gimbal after changing filters.
Avoid stacking filters (like ND + CPL) unless your gimbal can handle it.
2. Setting up and using ND filters with your DJI drone
Set your drone’s camera to "Manual" mode via the DJI app to prevent automatic exposure corrections.
Lock ISO (as low as possible, usually ISO 100).
Set shutter speed and aperture manually (if available).
This prevents the drone from auto-adjusting mid-shot and changing your exposure mid-pan or tilt.
3.Choose the right ND Filter:
Check the exposure scale in your DJI app to identify overexposure.
Select the appropriate ND filter (e.g., ND4, ND8, ND16) to balance the image lighting.
Fine-tune camera settings until you achieve the desired result.
4.Always Do a Pre-Flight Check
Before launching:
Check for dust or fingerprints on the ND filter.
Verify exposure and focus in the preview.
Make sure your gimbal and motors aren’t strained by the added weight.
Bonus Pro Tip
lUse histograms or zebras on your drone’s display to check exposure. The screen brightness can be misleading outdoors — the histogram never lies.
lAlways power down the drone before attaching or removing filters to avoid damaging the gimbal.
Tips for Aerial Filming with ND Filters
By maintaining the ideal shutter angle, ND filters allow you to capture smooth and professional-looking footage that enhances the unique perspectives offered by drones.
Shutter Angle: Aim for a 180° shutter angle to create natural motion blur. For example, at 25fps, use a shutter speed of 1/50 of a second.
Effects of Shutter Angle changes:
Larger angles (e.g., 360°) result in excessive blur between frames.
Smaller angles (e.g., 45°) create jerky, stuttery footage.
Fixed ND filters, Variable ND Filters,and ND/PL:
1. Fixed ND vs Variable ND Filters
The first thing to understand is the difference between fixed ND filters and variable ND filters.
Fixed ND filters are available in set strengths like ND8, ND16, or ND32. These are the most reliable for drone videography. They offer consistent results and maintain image quality.
Variable ND filters, on the other hand, let you adjust the light reduction by rotating the filter. This is great for handheld cameras, but not for drones.
Most drone lenses are wide-angle, and variable filters can cause issues like vignetting or uneven exposure.
That’s why most professionals stick to fixed NDs when flying drones.
2. ND vs ND/PL
As you explore drone filters, you’ll likely find two main types: standard ND filters and ND/PL filters.
Both serve different purposes in drone videography, and choosing the right one depends on what and where you’re filming.
ND filters (Neutral Density) are used to control exposure by reducing the amount of light hitting the sensor.
Their main job is to let you maintain a slower shutter speed for proper motion blur, especially in bright conditions.
They’re simple, effective, and require no adjustment once mounted. These are ideal for general-purpose shooting in changing light or fast-paced environments.
ND/PL filters are hybrid filters that combine ND functionality with a polarizing element.
Along with reducing light, they also reduce glare and reflections from surfaces like water, glass, snow, or wet roads.
Polarization enhances contrast and color saturation, which can dramatically improve the look of reflective scenes.
However, there’s a trade-off.
Conclusion
Mastering ND filters is a creative choice that elevates drone footage from ordinary to genuinely cinematic.
When you learn to use these filters with purpose, you gain control over three key elements of your videos: movement, light, and visual tone.
Like every other part of drone filmmaking, consistency stems from a deliberate process. The more you familiarize yourself with ND filters, the more seamlessly they’ll integrate into your pre-flight preparations.
Once using them becomes second nature, you’ll see tangible improvements: smoother footage, more cinematic motion, and far fewer unexpected issues during the editing phase.
 4 Pack Compatible with DJI Avata 2, Multi-coated Neutral Density Drone Filters")

 3 Pack Compatible with DJI Avata 2, Multi-coated Neutral Polarizer Density Drone Lens Filters")

 Neutral Density Polarizer Filter Drone Camera Lens Accessories, Multi-Coated Top Optical Glass Light Reduction Polarizer Filter")


 Neutral Density Light Reduction Drone Lens Filter Set, Multi-Coated HD Optical Glass Drone Accessories")

 6 Pack Compatible with DJI Avata 2, Drone Accesorries with 28 Multi-Layer Coated")
 & Circular Polarizing Filter CPL 3 in 1 Lens Filter with 18 Multi-Coatings Nano-Klear Series")

 100x100mm Square Filter with Protective Frame, Waterproof ND Neutral Density Filter Light Reduction Filter made of HD Optical Glass, Nano-Xcel Pro Series")


")


