
Trail Camera How Does It Work?
Trail cameras are like the Sherlock Holmes of the wildlife world, possessing the uncanny ability to uncover what goes bump in the night—or day—without ever leaving the crime scene. But how do they actually work? Sure, you can slap one on a tree and cross your fingers, but understanding the mechanics behind their operation can elevate your tracking and scouting game to the next level. Let’s dive into the nitty-gritty of how these devices function and why they’re indispensable for hunters, researchers, and even that guy who's suspicious about raccoons stealing his backyard tomatoes.
Anatomy of a Trail Camera: Breaking the Tech Down
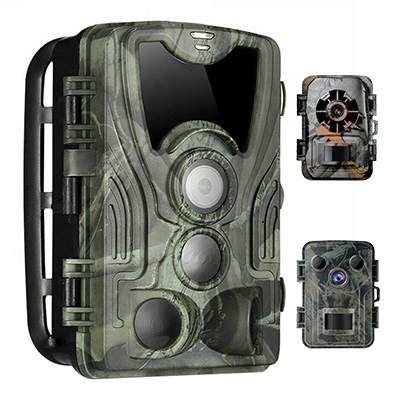
To understand the workings of a trail camera, think of it as a hybrid between a regular digital camera and a motion sensor, all wrapped in a weather-resistant shell. Inside, the magic begins with a few key components:
1. Lens and Image Sensor: The lens focuses light onto an image sensor inside the camera, which converts the optical signals into electronic data. The image sensor can be CMOS (Complementary Metal-Oxide-Semiconductor) or CCD (Charge-Coupled Device), though CMOS is far more common in modern trail cameras due to its affordability and energy efficiency.
2. Motion Detector (Passive Infrared Sensor): This is the brain behind what differentiates trail cameras from regular ones. The Passive Infrared (PIR) sensor detects changes in heat and movement within its range. The warm-bodied deer that waltzes by? The raccoon doing gymnastics on the tree branches? If there’s a temperature differential between the moving "object" and its surroundings, the PIR sensor triggers the camera to start snapping pictures or recording video.
3. Processor: Once the PIR sensor sends its "alert," the camera's processor kicks into gear, initiating the image capture or video recording. It also handles the storage of this data on an SD card or internal memory.
4. Infrared LEDs (Night Vision): Instead of flash photography—which would rudely announce the camera’s presence—the LEDs operate in near-invisible infrared wavelengths, allowing the camera to capture crisp night shots stealthily.
5. Power Source: Trail cameras typically run on batteries or external power sources. Their low-energy components enable them to sit in wait for weeks—or even months—without intervention.
6. Storage Systems: You'll typically find SD cards as the preferred storage format. Higher-end cameras also offer wireless connectivity to sync or upload data to your phone or cloud storage.
7. Programmable Settings: Trail cameras let users configure various settings, including detection sensitivity, picture or video modes, resolution, and time-lapse intervals.
The Method Behind the Scouting Madness: How It Detects and Records
Here’s the workflow step by step: A trail camera starts off in a passive state, doing nothing but scanning its surroundings for activity via the PIR sensor. When something warm moves into its detection range, the PIR picks up the infrared signature, sends a signal to the camera's processor, and activates the system.
Depending on your settings, the camera might snap a quick photo, record a video sequence for several seconds, or do both. The recorded visual data is then stored digitally, waiting for you to review it later—or sometimes sent wirelessly in real-time to your device if the camera is equipped with cellular technology.
Range and Resolution: Optimizing Your Setup
A trail camera’s effectiveness boils down to three critical parameters: detection range, trigger speed, and resolution.
1. Detection Range: This is how far the PIR sensor can "see" the heat signature of a moving object. Most consumer trail cameras have ranges spanning 30 to 80 feet. Then there’s the field of view (FOV), which determines the width of the detection area—always a key consideration when selecting where to mount your device.
2. Trigger Speed: The speed at which the PIR sensor triggers the camera to record is paramount for capturing fast-moving objects. The average consumer-grade camera operates at about 0.5 seconds, but high-end models push it down to 0.1 seconds or faster. That’s the difference between getting a full photo of a deer vs. a photo of its backside as it sprints away.
3. Resolution and Video Quality: Resolution determines the sharpness of your images; most modern trail cameras offer anywhere from 8 MP to a whopping 30 MP. For video recording, 1080p HD has become standard, with higher-end models offering 4K Ultra HD.
Day Versus Night: The Role of Infrared LED Technology
Trail cameras use infrared LEDs for night photography, and here’s the golden nugget of wisdom: Not all infrared lights are created equal. Low-glow infrared LEDs emit faintly visible red light, which, although subtle, might still spook certain game animals. No-glow infrared is the ninja option—it’s completely invisible to the naked eye but still capable of illuminating the area effectively for the camera.
When activated, these LEDs bathe the scene in infrared light. The image sensor picks up this light and generates black-and-white imagery, ensuring you don’t miss a single nocturnal mystery.
Advanced Features: Not Just a Dumb Box of Tricks
For the tech-savvy tracker or hunter, trail cameras come loaded with bells and whistles that make their operation way cooler than your standard point-and-shoot model:
Time-Lapse Mode: This mode toggles the camera to take a photo at predefined intervals, irrespective of motion detection—ideal for monitoring large open fields for patterns in wildlife behavior.
Cellular Connectivity: Imagine getting images or videos sent directly to your phone as the camera captures them. Cellular-enabled trail cameras use a SIM card to upload data via 4G networks, making them convenient for high-traffic areas where constant monitoring is vital. Useful? Yes. Budget-friendly? Not always.
Weather Resistance: They’re built to tolerate extreme conditions. Freezing winter? Torrential rain? Sweltering summer heat? No problem, assuming the manufacturer didn’t cut corners.
App Integration: Many modern trail cameras pair with smartphone apps that allow users to fine-tune settings, view activity, or even update firmware remotely.
Best Practices and Key Considerations
Before you slap your trail camera onto the nearest tree trunk, keep these tips in mind:
1. Location, Location, Location: Setting up a trail camera isn’t just slapping it anywhere and hoping for the best. Focus on areas where wildlife activity is likely—game trails, water sources, feeding sites, or even entry points to your backyard for those meddlesome raccoons.
2. Height and Angle: Mount the camera at chest height and angle it slightly downward for enhanced field coverage.
3. Minimize Human Scent: Wildlife has an uncanny ability to detect human presence. Handle the camera with gloves, and avoid areas where you might leave lingering scent marks.
4. Take Advantage of Settings: Customize the camera’s detection sensitivity to avoid capturing false triggers, like leaves blowing past the sensor.
Use Cases: From Hunters to Conservationists (and Nosy Neighbors)
Hunters employ trail cameras to track game movement, studying patterns to optimize their hunting strategy. Conservationists use them to monitor endangered species, understand their habitats, and even patrol against poachers. Funny enough, even homeowners have joined the bandwagon; they use trail cameras to decipher nightly shenanigans courtesy of local critters—or, occasionally, adolescents who forgot to take “No Trespassing” seriously.
The Takeaway
Trail cameras are more than mere tools; they’re electronic storytelling devices. From hunting and conservation to backyard sleuthing, their ability to monitor remote locations and decipher nature’s mysteries puts them in a league of their own. By understanding the mechanics—lens, PIR sensor, infrared LEDs, processor—you now have the technical chops to deploy and utilize these devices more effectively. And hey, the next time a raccoon stages a late-night raid on your bird feeder, at least you’ll catch it in 4K Ultra HD.


